...

Your Local Driveway Contractor Morecambe

Send Us Email

advanceddrives2020@gmail.com

PHONE

07944680279

ADDRESS​

10 Altham Rd, Morecambe LA4 4UG, United Kingdom​

How To Install a Block Paving Manhole Cover? Service in Morecamb
Blog

How To Install a Block Paving Manhole Cover?

Block paving manhole covers, while often overlooked, are crucial components of urban infrastructure and home improvement projects. These innovative covers provide safety and ensure access to essential utilities by covering openings in streets and pavements. Learn How To Install a Block Paving Manhole Cover?

Traditional metal manhole covers have long been standard, but block paving manhole covers offer an aesthetic and functional upgrade. They integrate smoothly into the surrounding pavement, preserving the visual flow with their ability to match the design of your driveway or street. This type of manhole cover elevates customization possibilities, offering a solution that doesn’t disturb the continuity of your landscape but rather enhances it.

Let’s explore the detailed installation process to maintain the integrity of your picturesque surroundings.

What is a Block Paving Manhole Cover?

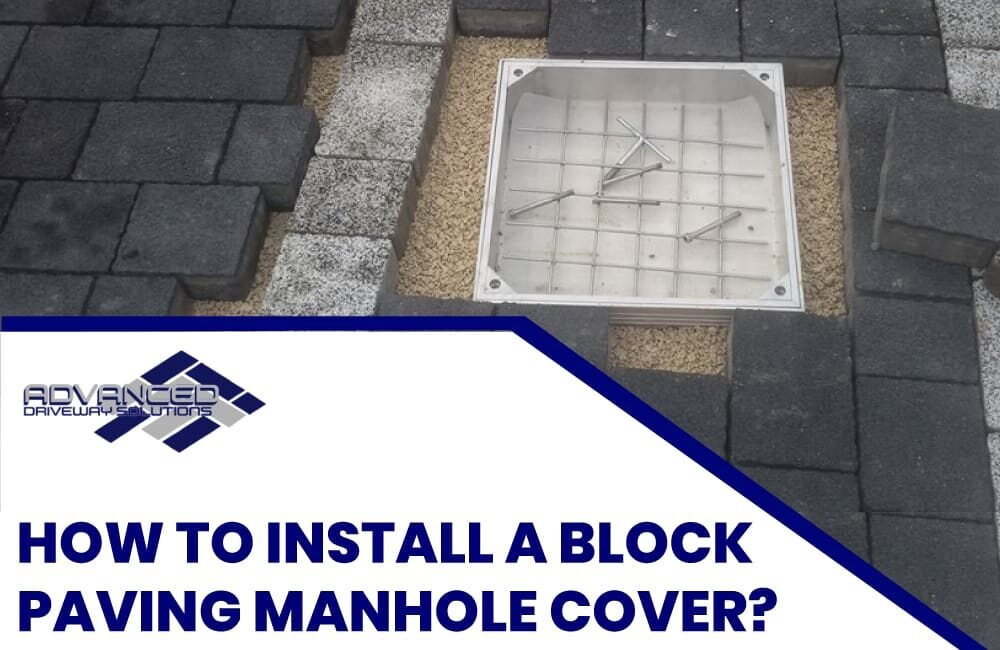
A block paving manhole cover is a specialized type of manhole cover designed to integrate seamlessly with block-paved surfaces, such as driveways or patios. Instead of the traditional solid metal or concrete covers that visibly contrast with their surroundings, these covers have a recessed tray.

This tray allows for the same block paving material that surrounds the manhole to be laid within it, creating a uniform appearance. When properly installed, the manhole becomes almost invisible, blending in harmoniously with the rest of the paved area, ensuring a consistent and uninterrupted pattern across the surface.

Tools and Materials Needed

For installing a block paving manhole cover, having the right tools and materials is essential to ensure a smooth and effective installation process.

Here’s a list of what you’d typically need:

Which Tools Do I Need to Pave Over a Manhole Cover?

  • Measuring Tape
  • Spirit Level
  • Trowel
  • Rubber Mallet
  • Block Cutter or Angle Grinder
  • String Line
  • Soft Broom
  • Protective Gear

Which Materials Do I Need to Pave Over a Manhole Cover?

  • Block Paving Manhole Cover Kit
  • Block Paving Stones
  • Sharp Sand or Bedding Mortar
  • Jointing Sand
  • Edge Restraints
  • Compaction Plate

Pre-Installation Preparation Of Block Pave Over Manhole Cover

Pre-Installation Preparation for a manhole cover installation is a crucial step to ensure the safety and functionality of the manhole system. Here’s a detailed breakdown of the key tasks involved:

  1. Contact utility companies for underground utility information.
  2. Set your budget.
  3. Use utility maps to locate utilities precisely.
  4. Visually inspect for obstructions.
  5. Accurately measure the manhole’s dimensions.
  6. Select a cover that matches the manhole’s size.
  7. Excavate and level the base area.
  8. Compact the base material thoroughly.
  9. Add bedding material for stability.

Step-by-Step Installation Guide Of Block Paving Manhole Cover

Consider the following steps for a successful and beautiful Block Paving Manhole Cover.

Step 1: Prepare the Area

  • Locate the manhole or inspection chamber that needs the cover and remove the old cover if present.
  • Clean the area around the manhole thoroughly, removing any debris, dirt, or loose paving blocks.

Step 2: Measure the Opening

Measure the dimensions of the manhole opening accurately. Ensure you take both the length and width measurements.

Step 3: Choose the Manhole Cover

Select a block paving manhole cover that fits the measurements you’ve taken. It should be the appropriate size to cover the opening.

Step 4: Prepare the Bedding

  • Excavate the area around the manhole to a depth slightly below the desired final level. Typically, a depth of around 15-20 cm (6-8 inches) is sufficient.
  • Create a solid and level bedding layer using sharp sand or a sand-cement mix. This layer should be compacted and levelled using a spirit level.

Step 5: Install the Manhole Cover

  • Place the block paving manhole cover in the centre of the opening, ensuring it fits snugly and sits level with the surrounding paving.
  • Use a rubber mallet to gently tap the manhole cover into place, making sure it is flush with the surrounding pavers.

Step 6: Cut and Lay Blocks

  • If the manhole cover doesn’t align perfectly with the existing block paving, you may need to cut some paving blocks to fit around it.
  • Use a saw or a block splitter to cut the blocks accurately, ensuring they match the pattern of your existing paving.
  • Lay the cut blocks around the manhole cover to create a seamless look.

Step 7: Fill the Gaps

  • Fill any gaps between the manhole cover and the surrounding blocks with sand or a sand-cement mix.
  • Brush the sand into the gaps and use a trowel to compact and level it.

Step 8: Compact and Finish

  • Compact the entire paved area around the manhole cover using a compactor or a hand tamper. This will ensure the blocks are secure and level.
  • Finish by sweeping fine sand or jointing compound over the entire paved surface to fill any remaining gaps between the blocks.

Step 9: Clean Up

  • Remove any excess sand or debris from the surface of the blocks.
  • Clean the manhole cover and the surrounding area to ensure it looks neat and tidy.

Step 10: Final Check

Use a spirit level to double-check that the manhole cover and the surrounding blocks are perfectly level.
Make any necessary adjustments if they are not.

Your block paving manhole cover should now be securely and aesthetically installed. Following these steps carefully is important to ensure a professional and long-lasting result.

How to Do Maintenance and Care of Block Paving Manhole Cover?

Maintaining and caring for a block paving manhole cover ensures its longevity and retains its aesthetic appeal.

Here’s a guide on how to do so:

  1. Inspect for damage or wear periodically.
  2. Sweep off dirt and debris.
  3. Remove weeds from joints.
  4. Re-sand joints if necessary.
  5. Apply a sealant for protection.
  6. Avoid heavy vehicles over the cover.
  7. Repair any loose or damaged blocks quickly.
  8. Consult a professional for significant issues.

When to Consider Replacing or Refurbishing?

Knowing when to replace or refurbish is crucial for longevity and safety. Over time, wear and tear, discoloured blocks, cracks, or uneven surfaces can hint at needed intervention. Persistent pooling of water, difficulty accessing the manhole, or a noticeable decline in aesthetic appeal are clear indicators.

Instead of waiting for full deterioration, proactive assessment and action can save costs and prevent hazards. Regularly inspecting and addressing minor issues promptly ensures functionality while maintaining curb appeal.

FAQs

How Long Does It Take to Install a Block Paving Manhole Cover?

The installation time for a block paving manhole cover typically ranges from a few hours to a full day, depending on the size of the cover, site conditions, and one’s experience with the process. It’s always best to allocate more time than estimated to account for any unforeseen challenges.

Can I Use Any Type of Block Paving?

While most block paving types can be used with manhole covers, it’s essential to ensure that the blocks fit securely within the recessed tray of the cover. It’s advisable to use blocks that match the thickness and style of the surrounding paving for a seamless finish. Always check the manufacturer’s recommendations for compatibility.

How Often Should I Check the Manhole Cover For Damages?

It’s a good practice to inspect your manhole cover for damages at least twice a year. However, consider checking it quarterly if the area sees heavy traffic or is exposed to extreme weather conditions. Regular inspections help identify and address minor issues before they escalate, ensuring longevity and safety.

How To Install a Block Paving Manhole Cover | Conclusion

Block paving manhole covers have revolutionized the aesthetics and functionality of urban and residential settings. Their seamless integration with the surrounding pavement offers a uniform appearance and reduces potential tripping hazards associated with traditional raised covers. While straightforward, the installation requires attention to detail, the right tools, and, occasionally, a full day’s work.

Regular maintenance and timely inspections, at least biannually, are crucial. Doing so can identify minor issues before they escalate into more significant problems, ensuring the manhole cover’s longevity and continued aesthetic appeal. Investing time in regular checks and care ensures that they remain functional elements in a landscape and visual assets that enhance overall property value.

Block Paving

The Role of Driveways in Home Security: What You Need to Know

In this comprehensive guide, we’ll delve into the often-underestimated Role of Driveways in Home Security. From strategic lighting to the latest smart technology, we’ll explore how a well-designed driveway can provide a powerful first line of defence, granting you peace of mind and keeping potential threats at bay. We’ll equip you with the essential knowledge to transform your driveway from a simple slab of concrete into a secure approach that safeguards your home and family.

Understanding the symbiotic relationship between driveway design and home security is not just a matter of safety; it’s a smart investment in the sanctity and integrity of your private domain. Join us as we pave the way to a more secure home, starting with the ground beneath your wheels.

Understanding the Security Risks Associated with Driveways

The driveway serves as the main entrance to many homes, and as such, it can often be the starting point for security threats. From opportunistic burglars to organized criminals, the driveway can either invite or deter potential intruders.

Common Driveway Security Threats

  • Driveways without secure gates or barriers are prime targets for vehicle theft.
  • Intruders may use the driveway as a point to survey a home for vulnerabilities and access points.
  • Open driveways can allow unauthorized individuals to follow residents into the property, bypassing security measures like gate codes.

Driveway Vulnerabilities

  • Poor lighting and obstructive landscaping create blind spots and hiding places for intruders.
  • A straight, unobstructed driveway can provide a quick and easy path for intruders to reach the home or retreat rapidly after committing a crime.

Transforming Vulnerabilities into Assets

  • Well-placed lighting can illuminate dark corners and deter criminal activity.
  • Security cameras with a clear view of the driveway can monitor for suspicious activity.
  • Gates and barriers act as physical deterrents and can be augmented with access control systems for better security.

Real-World Implications

Statistics often reveal that homes with clear, well-lit driveways have lower rates of break-ins. Case studies have highlighted instances where security measures on driveways have either failed or successfully thwarted criminal activities, providing valuable lessons on best practices in driveway security.

20 Important Role of Driveway in Home Security

1. Essential Elements of Driveway Security

To effectively secure a driveway, homeowners must consider several crucial elements. Visibility, lighting, and the materials used in the construction of the driveway are foundational to creating a secure entrance to your property.

2. Visibility: The Foundation of Driveway Security

Clear View: A driveway should provide an unobstructed view from the house to the street, allowing for easy monitoring of any activity.
Landscaping Considerations: Trees and shrubs should be trimmed to eliminate potential hiding spots for intruders and ensure surveillance equipment has a clear line of sight.

3. Lighting: Deterrence Through Illumination

Strategic Placement: Lights should be positioned to cover all areas of the driveway, avoiding shadows and dark spots that could conceal an intruder.
Motion-Activated Options: Motion-sensor lights not only save energy but can also startle and deter potential trespassers.

4. Materials: Building a Barrier Against Intrusion

Durable Surfaces: The choice of material for the driveway surface impacts its durability and the ability to bear the weight of security barriers or gates.
Non-Slip Textures: For safety and security, the surface texture should provide traction to prevent slips and falls during adverse weather conditions.

5. Surveillance: Eyes on the Ground

The importance of a clear line of sight cannot be overstated when it comes to surveillance. Cameras positioned to view the entire length of the driveway ensure that there are no blind spots for intruders to exploit.

6. Construction and Maintenance: The Preventive Approach

Sturdy Construction: A well-constructed driveway can support the weight of vehicles and security installations without cracking or shifting, which could otherwise create tripping hazards or hiding spots.
Regular Maintenance: Keeping the driveway in good repair prevents the development of concealment spots and indicates a well-guarded property, thereby discouraging trespassers.

7. Security Enhancements for Your Driveway

Enhancing the security of your driveway involves a combination of lighting, access control, surveillance, alert systems, and the strategic use of signage. Each of these components plays a vital role in creating a comprehensive security strategy.

8. Illuminating Safety: Driveway Lighting Solutions

Ambient Lighting: Provides overall illumination, creating a welcoming environment while ensuring visibility.
Task Lighting: Focuses on specific areas like the garage door or entry gates for clear visibility during specific activities.
Aesthetic Lighting: Enhances the home’s architectural features while contributing to security by illuminating the driveway.
Motion Sensor Lighting: Acts as a deterrent by reacting to movement, signalling that the property is monitored and responsive.

9. Controlling Access: Gates, Barriers, and Entry Management

Automated Gates: Provide secure entry with the convenience of remote opening and closing.
Physical Barriers: These can include bollards or decorative elements that also function as security features.
Keypad Entry Systems: Allow secure access through coded entry, which can be changed regularly for added security.

10. Strategic Surveillance: Keeping a Watchful Eye

Fixed Cameras: Offer a constant view of specific areas and can be visible as a deterrent.
PTZ (Pan-Tilt-Zoom) Cameras: Allow for a wide range of movement and zooming capabilities to follow activities on the driveway.
Integrated Systems: Connect cameras to the home’s central security system for real-time monitoring and alerts.

11. Early Warning: Driveway Alert Systems

Pressure Sensor Alarms: Trigger an alert when a certain weight threshold is met, such as when a vehicle enters the driveway.
Infrared Motion Detectors: Sense movement and heat, sending an alert when someone approaches.

12. Deterrence Through Communication: Signage as a Security Measure

Security Signs: Inform potential intruders that the property is under surveillance and protected, which can act as a psychological barrier.
Warning Signs: Clearly state the presence of security measures like alarms or guard dogs, even if such measures are not actually in place, to add a layer of perceived security.

13. Technological Advancements in Driveway Security

The evolution of home security has seen the driveway become not just a physical space but a hub of smart technology. Here’s how cutting-edge innovations are setting new standards for driveway security:

14. Smart Technology: The New Sentinel on Your Driveway

Introduction to Smart Driveway Security: Overview of how smart technologies are revolutionizing the way homeowners secure their driveways.
The Convenience of Automation: Discuss the benefits of having driveway lighting, gates, and surveillance cameras that can be controlled remotely via smartphone or computer.
Integration with Home Assistants: Highlight how driveway security devices can be connected to voice-controlled smart home assistants for seamless operation.

15. License Plate Recognition: The Digital Gatekeeper

Automatic Number Plate Recognition (ANPR) Cameras: Explain the technology behind ANPR systems and how they can be used to control access to a property.
Customized Access Control: Detail how homeowners can use ANPR to allow entry to known vehicles and alert to unknown ones, enhancing security and convenience.

16. Seamless Security Ecosystems: The Smart Driveway in a Connected Home

Unified Security Systems: Outline the advantages of integrating driveway security devices with other home security systems.
Real-Time Alerts and Monitoring: Discuss the capabilities and benefits of receiving real-time notifications about driveway activity, whether you’re at home or away.
Data-Driven Security: Explore how analytics can be used to learn patterns and detect anomalies in driveway traffic, improving the overall security posture.

By embracing these technological advancements, homeowners can not only deter would-be intruders but also create an efficient, responsive, and interconnected security system right from their driveway.

17. Landscaping and Environmental Design for Security

The design of your home’s landscape can be a strategic aspect of your overall security plan. Thoughtful landscaping and environmental design can significantly enhance the security of your driveway and home.

18. Defensive Landscaping: Nature’s Barrier

The Principles of Defensive Landscaping: Introduce the concept and how it uses natural elements to protect your home.
Strategic Plant Placement: Discuss how the placement of thorny plants or dense shrubs near potential entry points can act as a natural barrier to intruders.

19. Aesthetic Meets Security: Driveway Design

Visual Deterrence with Style: Provide ideas on how to use landscaping to create a secure yet attractive driveway area.
Lighting and Plant Combination: Tips on combining low-lying plants with adequate lighting to maintain visibility and deter potential trespassers.
Maintaining Sight Lines: Emphasize the importance of keeping key areas of the driveway visible from inside the house and from the street.

20. Natural Surveillance: The Driveway’s Watchful Eye

Leveraging Natural Surveillance: Explain how the strategic design of landscaping can increase visibility for natural surveillance by neighbours or passersby.
Environmental Design for Enhanced Visibility: Discuss the role of tree canopies, hedge heights, and sightline trimming in maintaining clear visibility across the driveway.
Integration with Technology: Suggest ways to integrate landscaping with surveillance cameras and motion sensors to maximize the security benefits without compromising the beauty of the outdoor space.

Also read: How To Hire A Driveway Contractor?

Best Practices for Driveway Security

  1. Regularly evaluate your driveway’s security setup.
  2. Stay informed about new security technologies and landscape designs.
  3. Combine physical barriers with electronic security measures.
  4. Use a mix of ambient, task, and motion-sensor lighting.
  5. Routinely check and maintain security devices.
  6. Keep landscaping well-trimmed to prevent hiding spots.
  7. Maintain sturdy gates and update access codes often.
  8. Connect driveway security to your home’s main system.
  9. Use smart systems to control security from afar.
  10. Encourage a neighbourhood watch approach.
  11. Post security signs as a visual deterrent to potential intruders.

Conclusion

In conclusion, a secure driveway is not merely a luxury but a necessity in safeguarding your home. You fortify your first line of defence by understanding the risks, employing strategic lighting, enforcing access control, leveraging surveillance, and maintaining your property. Technological advancements, particularly in smart security, offer unprecedented control and monitoring capabilities, integrating seamlessly with our daily lives. Defensive landscaping further enhances security measures, blending aesthetics with protection.

Adhering to the best practices of driveway security, from regular assessments to community vigilance, can deter potential intruders and provide peace of mind. It’s clear that a well-secured driveway is a pivotal component of home security, one that requires thoughtful consideration and action. By implementing these strategies, homeowners can ensure that their driveway is not a vulnerability but a robust shield for the protection of their home and family.

Block Paving

How to Deal with Common Driveway Issues?

Your driveway is more than just a path to your garage—it’s the red carpet to your home, setting the stage for curb appeal and property value. However, it’s also exposed to the elements and subjected to constant wear, which can lead to a range of common issues. From unsightly cracks that mar its surface to potholes that threaten to trip up your tire, a driveway can encounter various problems that diminish its aesthetics, pose safety hazards, and decrease your property value. Learn How to Deal with Common Driveway Issues?

The good news is that the right knowledge and care can prevent many of these issues. Understanding the root causes of driveway deterioration is the first step to keeping your drive in top shape. Whether it’s the relentless sun causing the colour to fade, the freeze-thaw cycle turning small cracks into big problems, or even de-icing products eating away at the surface, each issue has a preventive solution.

Let’s dive in and lay the foundation for a driveway that stands the test of time.

How to Deal with Common Driveway Issues?

Understanding the common issues is crucial in taking preventative steps to avoid costly repairs and maintain the longevity and aesthetics of your driveway.

Here are some of the most common driveway issues and how they can be prevented:

1. Cracking

Cracking is a prevalent issue for driveways and can be a gateway to various structural problems if not addressed.

Causes of Cracking

Cracking in driveways is a common but avoidable nuisance. It can stem from:

Temperature Fluctuations and Weather Conditions: The expanding and contracting of materials with changes in temperature can lead to cracks. Especially in regions with severe weather changes, driveways can crack under the pressure of the freeze-thaw cycle.

Poor Installation or Inadequate Base: A driveway is only as sturdy as its foundation. If a driveway is laid on an uneven or insufficient base, the surface is more likely to crack under any pressure or shift in the ground.

Prevention Tips

To prevent cracking, certain steps need to be taken:

Proper Installation with a Strong Foundation: A solid base is critical for the longevity of a driveway. During installation, ensure that the foundation is compact and level to provide the best support for the surface material.

Regular Sealing and Prompt Repairs: Apply a high-quality sealant periodically to protect the driveway from water and weather damage. If small cracks appear, address them immediately to prevent them from expanding.

Consideration of Climate-Appropriate Materials: Choosing the right materials for your region’s climate can greatly reduce the risk of cracking. For instance, in colder climates, materials that can withstand the freeze-thaw cycle without cracking are the better choice.

2. Potholes

Driveway potholes are not just a problem for your vehicle’s suspension; they’re a symptom of the health of your driveway. Left unchecked, they can grow, causing more significant issues and leading to costly repairs.

Formation of Potholes

Water Infiltration and Freeze-Thaw Cycles: Potholes often start as small cracks which allow water to infiltrate. This water then expands as it freezes, exerting pressure that breaks the pavement apart. When the ice melts, it leaves behind a void where the pavement can collapse and form a pothole.

Wear and Tear from Vehicles: The weight of cars and trucks passing over the same spot can put a strain on the driveway, particularly where water has weakened the surface. Over time, this wear and tear can lead to the development of potholes.

Prevention Strategies

To protect your driveway from potholes, consider these steps:

Effective Drainage Solutions: Proper drainage is essential to prevent water from pooling and seeping into the pavement, thus preventing the freeze-thaw cycle that leads to potholes.

Regular Inspection and Maintenance: Keeping an eye out for early signs of damage and addressing them quickly can prevent minor issues from escalating into potholes.

Use of Durable Paving Materials: Opting for quality paving materials that can endure the rigours of weather and vehicles is an effective way to reduce the formation of potholes.

Adhering to these prevention strategies can help maintain a smooth and durable driveway, saving you from the hassle and expense of dealing with potholes.

3. Fading and Discoloration

Fading and discolouration of a driveway can detract from your home’s curb appeal and may signal surface wear that could lead to further damage if ignored. To preserve the pristine appearance and integrity of your driveway, it’s important to understand what causes this fading and how to prevent it.

Reasons for Fading

UV Exposure and Weather Elements: Just like the sun can damage your skin, it can also fade and weaken your driveway. Constant exposure to UV rays and various weather conditions can bleach out the colour and deteriorate the surface materials.

Spillage of Chemicals and Oil: Driveways often become the accidental recipients of various chemical spills. Oil, gasoline, and other harsh substances can leave behind stains and discolouration and, over time, can eat away at the sealant and the pavement itself.

Preventative Measures

To combat fading and keep your driveway looking new, consider these actions:

Application of Sealants and UV Protectants: Regularly applying a high-quality sealant can provide a barrier against the sun’s rays and other damaging weather elements.

Prompt Cleaning of Spills and Stains: Quick action on spills, especially oil and chemicals, can prevent stains from setting and causing discolouration. Having a routine cleaning schedule can also prolong the life of your driveway’s surface.

4. Weeds and Grass Growth

Weeds and grass can transform a sleek driveway into a dishevelled and unkempt space, potentially causing further damage if left unchecked. Tackling the root causes of this growth can keep your driveway pristine and prevent the expensive repairs that come with overgrown weeds.

Causes of Weedy Growth

Cracks and Gaps Allowing for Seed Penetration: Even the smallest cracks in your driveway can become a haven for weeds. Seeds blown by the wind find these cracks, take root, and can quickly grow into unsightly and damaging weeds.

Overhanging Vegetation and Poor Edging: Vegetation overhanging your driveway can drop seeds directly onto the surface. Additionally, poorly edged driveways allow grass and weeds from your lawn to encroach upon and breach the edges of the pavement.

Prevention Approaches

To maintain a weed-free driveway, implement these preventative measures:

Sealing Cracks and Joints: Regularly inspect your driveway for cracks and seal them promptly. This not only prevents weeds but also protects the driveway from further damage.

Regular Edging and Application of Weed Preventers: Keep the edges of your driveway clear with regular edging, and consider using pre-emergent weed preventers to stop weed seeds from germinating.

Also read: How To Install a Block Paving Manhole Cover?

5. Drainage Issues

Proper drainage is crucial for driveway longevity and safety; without it, homeowners may face a slew of issues that can lead to significant damage and hazards. Ensuring effective drainage is in place can save on extensive repair costs and reduce accident risks.

Impact of Poor Drainage

Water Accumulation Leading to Structural Damage: Standing water is the nemesis of driveway longevity. It seeps into tiny cracks and under the driveway, which can lead to serious structural damage over time, especially if the water undergoes freeze-thaw cycles.

Increased Risk of Slipping and Accidents: Pools of water on the surface of the driveway can create a slipping hazard for both pedestrians and vehicles, increasing the risk of accidents and injuries.

Prevention Tactics

To prevent these issues, consider the following tactics during installation and maintenance:

Proper Slope and Grading During Installation: A driveway should be designed with a slope that guides water away from the surface, preventing pooling and the subsequent issues it can cause.

Installing Drainage Systems Like Channels or Grates: Including built-in drainage systems can greatly improve water management, directing it away from the driveway and into appropriate drainage areas.

6. Undermining by Tree Roots

The verdant allure of trees can add beauty and value to any property, but their roots can wreak havoc on the integrity of your driveway. Understanding the potential for damage and taking steps to mitigate it can prevent costly repairs and maintain the seamless look of your driveway.

Effects of Tree Roots

Lifting and Cracking of Pavement: As tree roots grow, they can exert considerable force on the pavement above, leading to lifting and cracking. This can cause uneven surfaces, creating tripping hazards and diminishing the driveway’s appearance.

Long-term Structural Damage: The persistent growth of roots beneath a driveway doesn’t just cause surface-level issues; it can also compromise the structural base of the driveway, leading to more severe and long-term damage that may require complete replacement.

Preventative Actions

To protect your driveway from the potential damage caused by tree roots, consider these actions:

Strategic Tree Planting Away from Driveways: When landscaping, plant trees at a distance that accounts for their mature root spread, ensuring they won’t reach the driveway as they grow.

Root Barriers and Regular Root Maintenance: Installing root barriers at the time of tree planting can direct root growth deeper into the soil and away from your driveway. Additionally, regular root maintenance by a professional can help manage root growth without harming the tree.

Taking these preventative steps helps maintain the structural integrity of your driveway and the health of your trees, ensuring both can coexist beautifully and without conflict.

7. Wear and Tear from Heavy Loads

The durability of a driveway is put to the test under the weight of heavy vehicles. Over time, the strain from such loads can lead to wear and tear, which not only affects the driveway’s appearance but also its structural soundness.

Consequences of Heavy Loads

Surface Damage and Base Compression: Heavy loads can cause ruts, depressions, and cracks on the surface of a driveway. The pressure can also compress and shift the base material, undermining the driveway’s structural integrity.

Shortened Driveway Lifespan: Regular traffic from heavy vehicles can accelerate the deterioration of a driveway, significantly reducing its expected lifespan and leading to more frequent and costly repairs or replacements.

Prevention Suggestions

To minimize the damage from heavy loads, here are some proactive measures:

Use of Thicker Pavement Sections for Anticipated Loads: When constructing a driveway, consider the types of vehicles that will use it. Using thicker pavement sections can provide the necessary support for heavier loads, preventing damage.

Limiting the Frequency of Heavy Load Traffic: Whenever possible, limit the use of your driveway by heavy vehicles. If heavy traffic is unavoidable, consider reinforcing the most commonly used sections to withstand the extra weight.

By taking these preventative steps, you can help ensure your driveway remains in good condition, capable of withstanding the demands of daily use without succumbing to premature wear and tear.

8. De-icing Damage

The icy grip of winter can lead to hazardous conditions on driveways, necessitating the use of de-icing chemicals. While these chemicals are effective at melting ice, they can also cause significant damage to the driveway surface if not used carefully.

Damage from De-icing Chemicals

Pitting and Surface Erosion: De-icing agents, particularly those that are chloride-based, can cause pitting, where small holes form on the surface, as well as general surface erosion. This not only affects the aesthetic of the driveway but also its structural integrity.

Acceleration of Freeze-Thaw Damage: Chemicals lower water’s freezing point. This leads to more freeze-thaw cycles. The cycles cause driveway materials to expand and contract. Over time, this results in cracks and potholes.

Prevention Techniques

To minimize the impact of de-icing on your driveway, consider these techniques:

Use of Safer De-icing Alternatives: Choose calcium magnesium acetate (CMA) as a driveway-safe alternative. It’s less corrosive. CMA is safer for concrete surfaces.

Protective Sealant Applications Before Winter: Using a good sealant can block moisture and chemicals, preventing de-icing corrosion.

Conclusion

Addressing common driveway issues efficiently is crucial. Regular maintenance, such as sealing cracks and proper cleaning, can prevent larger problems. If issues like potholes or drainage concerns arise, seek professional advice promptly.

By tackling these problems head-on, the question of “How to Deal with Common Driveway Issues?” becomes manageable, ensuring a safe and appealing driveway that complements your home for years to come.

Block Paving

How To Hire A Driveway Contractor?

Are you planning a driveway project? Choosing the right contractor is crucial for success. You should know “How To Hire A Driveway Contractor” effectively. Selecting the right contractor can significantly impact your project’s outcome. From defining your project requirements to researching potential contractors, checking qualifications, reading reviews, and evaluating experience, we’ll cover every aspect of the selection process.

We’ll also delve into crucial considerations like project timelines, payment terms, and contracts, ensuring you avoid common pitfalls and maintain a smooth working relationship. Plus, we’ll highlight the importance of warranties and after-service support.

Let’s embark on your journey to find the perfect driveway contractor for your project!

9 Tips on How To Hire A Driveway Contractor

These are 9 essential points to consider when hiring a driveway contractor

1. Define Your Project Requirements

Before embarking on your search for a driveway contractor, it’s essential to have a clear understanding of your project’s specific requirements. Determine the type of driveway material you want (e.g., concrete, asphalt, pavers), the design or pattern you prefer, the size of the driveway, and any special features like borders or lighting.

This initial step ensures that both you and potential contractors are on the same page regarding the scope of the project, making it easier to solicit accurate quotes and assess contractor suitability.

2. Research and Create a List

Research is the foundation of your contractor search. Start by seeking recommendations from friends, family, or neighbors who have had similar driveway work done. Additionally, explore online directories and local business associations to identify potential contractors in your area. Create a list of candidates and ensure they are licensed, insured, and have a positive reputation within the community.

3. Check Credentials and Qualifications

Verifying a contractor’s credentials and qualifications is crucial to meet legal and professional standards. Check if they hold the required licenses and permits for your region, as these regulations can vary.

Confirm that they carry liability insurance to protect you in case of accidents or damage during the project. Ensuring these qualifications are in place gives you confidence in the contractor’s legitimacy and commitment to professional standards.

4. Read Reviews and Ask for References

To gauge a contractor’s reputation and performance, read online reviews and testimonials from previous clients. Look for patterns of positive feedback and any concerns raised by customers. Additionally, request references from the contractor and contact past clients directly.

This allows you to ask specific questions about their experiences and satisfaction with the contractor’s work. The insights gained from reviews and references can help you make an informed decision based on the contractor’s track record.

5. Conduct Interviews and Get Quotes

Interviews and quotes are essential steps in the selection process. Schedule meetings with potential contractors to discuss your project in detail. During these interviews, ask about their approach to the work, the materials they recommend, and their estimated project timeline.

Request detailed quotes that break down costs for materials, labor, and any additional expenses. Having multiple quotes enables you to compare and assess the value and professionalism of each contractor.

6. Evaluate Experience and Portfolio

Assessing a contractor’s experience and past work is a vital aspect of your decision-making process. Inquire about their experience with driveway projects, including their expertise in the specific material you’ve chosen.

Review their portfolio of completed projects, looking for examples that align with your design preferences and quality expectations. A well-established contractor with a diverse portfolio is more likely to have the expertise needed to execute your project successfully.

7. Discuss Timeline and Project Schedule

Effective communication regarding project timelines is essential to avoid misunderstandings and meet your expectations. Clearly articulate your preferred start and completion dates, taking into account any special considerations such as weather constraints.

Ask potential contractors about their availability and their ability to meet your schedule. A contractor who can align with your timeline will help you plan the project efficiently and minimize disruptions.

8. Understand Payment Terms and Contracts

Understanding payment terms and having a formal contract in place is critical for both parties’ protection. Discuss the contractor’s payment structure, which typically includes initial deposits and installment payments based on project milestones.

Request a written contract that outlines all project details, costs, materials, and timelines. This contract serves as a legally binding agreement that provides clarity and accountability throughout the project, helping to prevent disputes and miscommunications.

9. Confirm Warranty and After-Service Support

Inquire about the warranty and after-service support offered by the contractor. Understand the terms and duration of the warranty for the driveway work, including coverage for any defects or issues that may arise after completion.

Clarify what kind of post-project support the contractor provides, such as addressing any concerns or issues that may surface once the driveway is in use. A reputable contractor will stand by their work and offer adequate warranties and support to ensure your satisfaction and the longevity of your driveway.

Also Read: How to Deal with Common Driveway Issues?

Questions to Ask a Driveway Concrete Contractor

  1. Are you licensed and insured?
  2. Can you provide references and examples of past projects?
  3. What is your experience with concrete driveways?
  4. What is the recommended concrete mix for my driveway?
  5. How will you prepare the site and handle excavation (if needed)?
  6. What is the estimated timeline for my project?
  7. Can you provide a written and itemized estimate?
  8. What is your payment schedule?
  9. Do you offer any warranties or guarantees?
  10. How will you handle potential issues or changes during the project?

Conclusion

Hiring the right driveway contractor is a pivotal decision in ensuring the success of your driveway project. By following the comprehensive steps outlined in this guide, you can navigate the selection process with confidence and clarity.

From defining your project requirements to conducting thorough research, checking credentials, and evaluating experience, each step serves as a critical building block toward securing a contractor who aligns with your vision and expectations. Discussions about timelines, payment terms, and the importance of a well-defined contract underscore the significance of open and transparent communication.

Step-by-Step Installation Guide for Marshalls Tegula Block Pavin
Block Paving

Step-by-Step Installation Guide for Marshalls Tegula Block Paving

When we think of modern landscaping, the importance of the groundwork often goes unnoticed. Yet, the paving beneath our feet provides stability, adds charm, and complements the greens and blooms of our gardens. Enter Marshalls Tegula Block Paving: a method that’s not just about laying stones but creating visually appealing and durable pathways and patios that elevate a space’s entire look and feel.

Over the years, block paving has become integral to contemporary landscaping. It’s not just about function; it’s about crafting beautiful outdoor spaces that are built to last. And when we talk about longevity combined with beauty, one brand stands out—Marshalls.

Marshalls is not just another name in the world of paving; it’s a hallmark of quality. For instance, their Tegula block paving range beautifully encapsulates what the brand is all about. Known for its tasteful appearance and robust design, Tegula is a perfect blend of tradition and modernity. As we journey through this article, we’ll explore the nuances of Marshalls Tegula block paving and discover why it’s a top choice for homeowners and professionals alike.

What is Marshalls’ Tegula Block Paving?

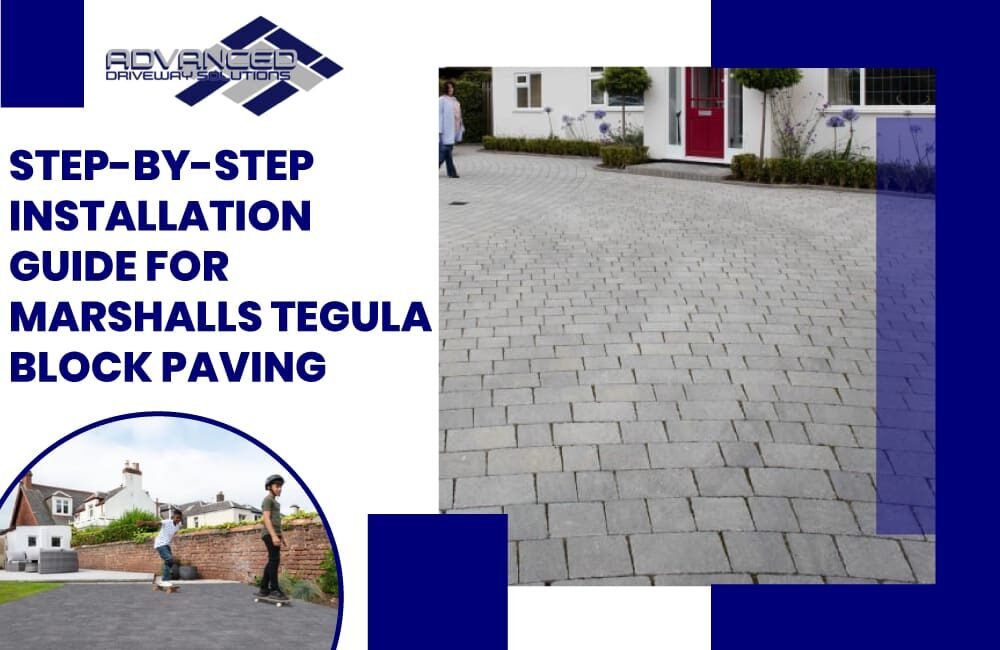
Marshalls Tegula Block Paving is a premium range of block paving products offered by Marshalls, renowned for its aged appearance that is designed to create a timeworn look. Made with durability in mind, Tegula blocks are often chosen for their distinctive, weathered aesthetics and long-lasting performance, suitable for driveways, patios, and pathways.

Benefits of Choosing Marshalls Tegula Block Paving

Marshalls is a reputable brand in the landscaping industry, known for producing high-quality products. Their Tegula block paving is particularly popular among homeowners and businesses for a variety of reasons. Here are some of the benefits of choosing Marshalls Tegula block paving:

Durable and Long-lasting

Tegula block paving is manufactured to withstand heavy use over time. Its durability ensures that it remains resistant to wear and tear, making it a long-term investment.

Aesthetically Pleasing

Tegula blocks have a timeless and rustic appearance that can enhance the look of driveways, patios, and pathways. Their unique design and colours can complement various architectural styles.

Versatile Design Options

Marshalls Tegula block paving comes in a variety of sizes, colours, and finishes, allowing homeowners to customize their outdoor spaces according to their preferences.

Low Maintenance

Once installed, Tegula block paving requires minimal maintenance. Any dirt or debris can be easily swept away, and the blocks retain their colour and finish even after years of exposure to the elements.

Environmentally Friendly

The manufacturing process of Tegula block paving is designed to have a reduced carbon footprint. Additionally, the blocks are permeable, which means they allow water to pass through, reducing the risk of surface water runoff and potential flooding.

High Load Bearing Capacity

Tegula block paving is robust and can support heavy loads, making it suitable for both residential driveways and commercial spaces with high traffic.

Weed Resistant

The way Tegula block paving is laid, along with its tight interlocking design, reduces the chances of weed growth between the blocks.

Safety

The textured surface of Tegula blocks provides good traction, reducing the risk of slipping, especially during wet conditions.

Consistent Quality

Marshalls has stringent quality control measures in place, ensuring that every Tegula block paving product meets its high standards.

Enhanced Property Value

Investing in high-quality block paving like Marshalls Tegula can enhance a property’s curb appeal and value.

Installation Guide: Steps to Perfect Tegula Block Paving

Following is the simplified 10-step guide to installing Tegula block paving:

Site Preparation

Begin by marking out the area where you want the paving to be. Remove any plants, debris, or existing structures to clear the space.

Dig down to the required depth, generally around 200-250mm, for driveways to account for the sub-base, sand, and block thickness.

Install Edge Restraints

Lay down the edging stones or kerbs around the perimeter. This will provide the necessary restraint for the block paving. Secure them using a concrete haunching to keep them firmly in place.

Lay the Sub-Base

Spread a layer of crushed stone or MOT Type 1 to a thickness of about 100-150mm (for driveways). Compact it using a mechanical compactor to provide a sturdy base. Ensure it’s level and slightly sloping for drainage.

Install a Geotextile Membrane

You can lay a geotextile fabric over the sub-base to prevent weed growth and further stabilize the foundation.
Lay the Sand Bedding

Spread a layer of sharp sand to a depth of around 40mm. Level the sand using screeding rails and a straight edge, ensuring it’s even and smooth.

Lay the Tegula Blocks

Begin laying the Tegula blocks starting from a corner or straight edge, following your desired pattern. Use spacers or string lines to ensure straight and consistent lines.

Cutting Blocks

You might need to cut some blocks for edges or specific design elements. Use a block splitter or a diamond-blade saw for precise cuts. Always wear safety equipment.

Compact the Blocks

Once all the blocks are laid, run a compactor over the surface. This will ensure the blocks are fully bedded into the sand. Using a rubber mat on the compactor is a good idea to avoid direct contact and potential damage to the blocks.

Jointing and Finishing

Fill the joints between the blocks with kiln-dried sand. Brush it into the gaps using a soft broom. Compact the surface again to help the sand settle into the joints.

Final Cleanup and Sealing

Sweep away any excess sand and debris. You can also apply a sealant over the paved area to enhance durability, resist stains, and maintain the fresh look of the blocks for a longer time.

Also Read: Do You Need Planning Permission for Driveways?

Common Mistakes to Avoid When Installing Tegula Block Paving

  1. Inadequate Ground Prep: Don’t rush the base preparation. A weak base can cause sinking and uneven blocks.
  2. Ignoring Drainage: Always account for water runoff. Neglecting drainage can result in water pooling on the surface.
  3. Incorrect Sand Thickness: Use a consistent 40mm sand layer. Too much or too little can destabilize the blocks.
  4. Rushing Block Laying: Take your time and follow a pattern. Misaligned blocks can weaken the structure.
  5. Poor Edge Restraint: Ensure the paving’s perimeter is secure. Without it, blocks can shift outward over time.
  6. Skimping on Joint Filling: Fill all joints between blocks thoroughly. The inadequate filling can lead to weed growth and loose blocks.

How Much Does Marshalls Tegula Block Paving Cost?

Marshalls Tegula block paving is popular among homeowners and contractors for its durability and aesthetic appeal. Specific prices for this paving option can vary significantly based on region, retailer, and quantity. On average, you might find that prices fluctuate due to market demand, regional availability, and other economic influences.

For the most accurate and current pricing, potential buyers are advised to check Marshalls’ official website or contact local suppliers directly. It’s also crucial to factor in other costs associated with the project, such as labour, groundwork, and potential additional materials, ensuring a comprehensive budget.

Alternatives to Marshalls Tegula Block Paving

Several alternatives to Marshalls Tegula block paving cater to various preferences, budgets, and aesthetic requirements.

Here are some of the popular ones:

Bradstone Driveway Blocks

These are popular in the UK and come in various finishes, including a worn appearance similar to Marshalls Tegula.

Tobermore Shannon Paving

Another option offers a range of colours and is suitable for both driveways and patios.

Brett Alpha Paving

It is known for its durability and variety of sizes, which allows for various laying patterns.

Plaspave Modena Blocks

These come with a smooth finish and are available in various colours suitable for modern landscapes.

Natural Stone Setts

Some homeowners opt for granite, sandstone, or limestone setts for a more traditional and rustic look. They are typically more expensive but offer a timeless aesthetic.

How to Remove Spots from Pavers?

Removing efflorescence from pavers can help restore the appearance of your paved surfaces. Here are eight steps in detail to effectively remove efflorescence:

Safety Precautions

Before you begin, ensure you have the appropriate safety gear, such as gloves and safety goggles, to protect yourself from chemicals.

Gather Materials

You’ll need a few materials, including a stiff-bristle brush, a garden hose with a spray nozzle, a bucket, a pH-neutral cleaner, efflorescence remover (available at hardware stores), a scrub brush with soft bristles, and a pressure washer (optional).

Prepare the Area

Clear the paver surface of any debris, leaves, or loose dirt using a broom or a leaf blower. Make sure the pavers are dry before proceeding.

Dilute the Efflorescence Remover

Follow the manufacturer’s instructions to mix the efflorescence remover with water in a bucket. You’ll dilute it with water in a 1:1 or 1:2 ratio.

Apply the Efflorescence Remover

Pour the diluted efflorescence remover over the affected pavers, ensuring even coverage. Use a soft-bristle scrub brush to gently agitate the solution into the pavers, focusing on the areas with efflorescence.

Scrub and Rinse

Using the stiff-bristle brush, scrub the pavers thoroughly to help remove the efflorescence deposits. Allow the solution to sit on the pavers for the recommended time specified by the manufacturer (usually 10-15 minutes).

Rinse with Water

Rinse the paver surface with a garden hose or pressure washer to remove the efflorescence residue and any remaining cleaning solution. Make sure you rinse the area thoroughly to prevent any chemical residue from lingering.

Prevention Strategies for Spots on Block Paving

Proper Installation: Ensure correct installation with a well-prepared base.

Sealant: Apply a high-quality sealant to block paving for protection.

Regular Cleaning: Clean regularly to remove dirt and organic matter.

Proper Drainage: Ensure proper slope to prevent water pooling.

Joint Sand: Maintain joint sand to prevent gaps and water penetration.

Avoid Overwatering: Be cautious when watering near the paving.

Algae and Mold Prevention: Use specialized treatments when needed.

Cleaning Agents: Use mild cleaners for stains and spots.

Regular Maintenance: Inspect and address issues promptly.

Professional Help: Consult experts for persistent problems.

Conclusion

White spots on block paving can be a frustrating issue for property owners, but they are typically a result of various factors that can be addressed with the right knowledge and maintenance practices. While efflorescence, a common cause of white spots, is a natural occurrence in many concrete and masonry surfaces, it can be managed through regular cleaning and sealing of the paving. Additionally, identifying and addressing underlying issues, such as poor drainage or improper installation, can help prevent the recurrence of white spots.

Regular maintenance, including cleaning and resealing, can go a long way in preserving the aesthetics and functionality of block paving. It is essential to use appropriate cleaning methods and products to avoid damaging the surface further. Furthermore, consulting with a professional or seeking advice from experts in paving and landscaping can provide valuable insights and solutions tailored to your specific situation.

Block Paving Patterns and Styles:2023 Edition Service in Morecam
Block Paving

Block Paving Patterns & Styles: 2023 Edition

As we step into 2023, the landscaping canvas undergoes yet another transformation, showcasing innovative designs that seamlessly blend functionality with aesthetic brilliance. Block paving, a cornerstone in driveways and patios, is at the forefront of this metamorphosis. While it has firmly rooted itself in the annals of construction for its durability and adaptability, its ever-evolving patterns and styles keep it fresh and perennially relevant. From the majestic sweeps of herringbone to the meticulous precision of stack bonds, block paving patterns are not just about laying stones; they narrate stories, evoke emotions, and breathe life into mundane spaces.

This year, as sustainability meshes with artistry and tradition flirts with modernity, block paving patterns promise a visual treat. Whether you’re a homeowner looking to revamp your driveway or a professional landscaper searching for the next trend, this 2023 edition will unveil the tapestry of designs set to dominate the block paving world. Let’s embark on this journey, one block at a time.

Top Block Paving Patterns for 2023

Herringbone Takes a Twist

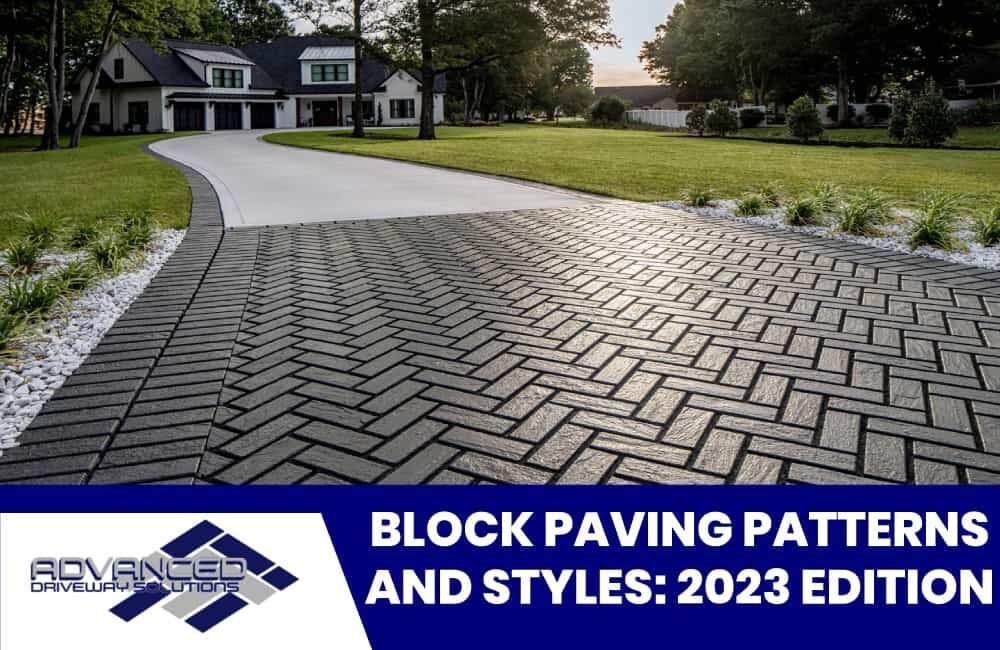
The ever-popular herringbone design, known for its V-shaped weaving pattern, takes a fresh spin in 2023. While the classic 45° and 90° styles remain evergreen, newer interplays of colours and slightly off-angle placements give it a contemporary edge.

Stack Bond’s Linear Elegance

Clean, simple, and modern, the stack bond pattern continues its ascendancy. Its uniform, grid-like design is accentuated by varying block tones, perfect for minimalist spaces, creating subtle yet eye-catching gradients.

Revival of Stretcher Bond

The stretcher bond, with its timeless brick-like arrangement, is witnessing a renaissance. While traditionally, it favoured longer, rectangular blocks, the 2023 trend leans towards using square blocks, offering a blend of the old and the new.

Basketweave’s Patchwork Charm

The basketweave pattern, reminiscent of woven baskets, showcases an alternating sequence of vertical and horizontal blocks. This year, it’s all about blending different textures and shades, making the weave pattern pop even more.

Circular & Spiral Patterns: Centerstage Beauty

Emerging as showstoppers, circular and spiral patterns are increasingly becoming focal points in larger spaces. Intersecting circles and radial spirals create mesmerizing visuals, especially when infused with multi-tonal blocks.

In 2023, block paving patterns are not just about practicality; they are a testament to art, creativity, and innovation. As homeowners and designers lean into these trends, driveways, patios, and walkways are set to become canvases of architectural expression.

The Role of Technology in Paving Design

Technology is becoming an indispensable ally in the rapidly evolving world of construction and landscape design. As we transition into a more digitally driven era, the realm of paving design is witnessing transformative changes.

Here’s a look at how technology is revolutionizing paving design:

1. Digital Design Software

Advanced software allows designers to create virtual mock-ups of paving patterns, allowing clients to see the result before a single stone is laid.

The technology ensures that measurements are accurate, preventing material wastage and ensuring seamless installations.

2. Augmented Reality (AR) and Virtual Reality (VR)

AR tools allow users to superimpose potential paving designs onto their real-world environments, offering a realistic view of how different patterns or materials might look in their actual space.

VR takes clients on a virtual tour, letting them “walk” through their newly designed spaces, making adjustments in real-time.

3. Drones for Site Analysis

Drones capture aerial footage of a site, giving designers a holistic view and helping them make informed decisions about grading, drainage, and pattern placements.

4. Sustainable Tech Solutions

Technology assists in creating more sustainable paving solutions, such as permeable pavers, which help in water management and reduce runoff.

5. Mobile Applications

Numerous apps now offer design templates, colour palettes, and material choices, facilitating instant client feedback and streamlined communication between all parties involved.

6. Automation and Robotics

Some advanced setups employ robots for tasks like laying pavers, ensuring precision, and speeding up installation.

Emerging Trends of Block Paving in 2023

1. Sustainable Materials

Permeable Pavers: With increased urbanization and concerns about water run-off, permeable pavers that allow water to seep through and reduce flooding may become more popular.

Recycled & Upcycled Materials: Using post-consumer waste or upcycled materials to create pavers might gain traction, aiding in environmental conservation.

2. Aesthetic Innovations

Multifunctional Designs: Pavers incorporating lighting, Wi-Fi capabilities, or heating elements.

Natural Tones and Textures: Earthy tones, matte finishes, and textures that mimic natural stones or wood could be sought after.

Artistic and Mosaic Patterns: Incorporating artistic expressions and cultural designs into block paving.

3. Advanced Manufacturing

3D Printed Pavers: With advancements in 3D printing, custom designs and intricate patterns can be easily produced.

Durability Enhancements: Pavers are manufactured to be more resistant to stains, scratches, and natural elements.

4. Smart Paving Solutions

Integrated Tech Pavers: Blocks integrated with sensors to gather data, aid in urban planning, or even assist in autonomous vehicle navigation.

Self-cleaning Pavers: Blocks treated with special coatings that make them resistant to dirt, moss, and algae.

5. Landscape Integration

Native Plant Inclusions: Designs incorporating local flora, allowing greenery to grow in and around the paving patterns.

Wildlife-friendly Pavers: Paving solutions that support local wildlife, like those that enable small creatures to move freely or ones that don’t heat up too much, protecting delicate insect feet.

6. DIY and Modular Solutions

Interlocking Systems: Pavers designed for easier installation without the need for professionals, appealing to the DIY market.

Modular and Adaptable Designs: Paving systems that can be easily changed, expanded, or adapted according to changing needs.

7. Historical Revival

Vintage Patterns: A return to older, classic patterns with a modern twist, celebrating architectural history.

8. Eco-friendly Maintenance

Natural Cleaning Solutions: Promotion and usage of eco-friendly cleaners and sealants for block pavers.

Reduced Carbon Footprint: Emphasis on manufacturing processes that reduce carbon emissions and other environmental impacts.

Maintenance & Care for Different Patterns

Maintaining and caring for block paving can vary depending on the specific pattern used. Different patterns may accumulate dirt or moss or be worn in unique ways. However, general maintenance practices can be applied to most patterns, with a few specific tips for individual styles.

Here’s an outline:

General Maintenance & Care

Regular Cleaning

  • Sweeping off leaves, debris, and dirt regularly using a stiff broom.
  • Washing with a mild detergent solution or a specially formulated block paving cleaner.

Moss, Algae, and Weeds

  • Apply herbicide or a weed killer, ensuring it’s suitable for block paving.
  • Use a block paving brush to remove moss or algae.

Stain Removal

  • Attend to oil stains quickly with a suitable cleaner.
  • For tougher stains like paint, seek specialized solutions or professional advice.

Re-sanding

  • Over time, the sand between joints might erode. Refill using kiln-dried sand.

Sealing

  • Consider applying a sealant to protect against stains and enhance the colour.
  • Ensure the surface is clean and dry before sealing.

Maintenance Based on Patterns

Herringbone Patterns

Due to the tight interlocking nature, these tend to be stable. Regularly check for any shifting or misalignment, especially at the edges.

Stretcher Bond Patterns

This pattern may show more linear wear and tear. Focus on maintaining joint sand levels and checking for edge restraints.

Basket Weave Patterns

Clean meticulously, as debris can get caught in the distinct squares. Regularly inspect for any loosening of blocks.

Circular Patterns

The central part might experience more wear due to focal attention. Occasionally rotate centrepieces if feasible.
Ensure the surrounding pattern maintains its symmetry.

Mixed Patterns

Depending on the combination, focus on the pattern that requires the most attention. For instance, if mixing herringbone with stretcher bond, ensure both maintain their structural integrity.

Real-time Design Integration: AR tools allow users to superimpose potential paving designs onto their real-world environments, offering a realistic view of how different patterns or materials might look in their actual space.

Immersive Experience: VR takes clients on a virtual tour, letting them “walk” through their newly designed spaces, making adjustments in real time.

The Bottom Line

In this 2023 edition guide, we’ve uncovered the dynamic world of block paving patterns and styles, showcasing the ever-evolving landscape of design possibilities for outdoor spaces. The array of patterns, from classic herringbone to intricate basketweave, highlights the aesthetic versatility and the practical functionality they offer. The emphasis on customization and creativity empowers homeowners and designers to craft unique landscapes that mirror individual tastes and architectural themes.

It’s evident that block paving patterns are not just about visual appeal; they contribute significantly to property value, durability, and overall ambience.

Do You Need Planning Permission For Driveway? Service in Morecam
Block Paving

Do You Need Planning Permission for Driveways?

When it comes to home improvements, there’s one topic that often leaves homeowners scratching their heads: “Planning Permission for Driveways.” Whether you’re thinking of upgrading your current driveway or installing a new one, understanding the ins and outs of planning permission is crucial. After all, the last thing anyone wants is to invest time and money into a driveway project only to find out it doesn’t comply with local regulations.

In this blog post, we will demystify the requirements surrounding planning permission for driveways, ensuring you’re equipped with the driveway knowledge you need to proceed confidently with your project. From materials to design considerations and the intricacies of local council rules, dive in to ensure your driveway enhances your home’s curb appeal and adheres to the necessary permissions and regulations.

What is Planning Permission?

Planning permission is a formal authorisation required by local authorities before development or a significant change to an existing property can commence. It’s a way to control the environment in which we live, ensuring that developments adhere to local policies and don’t adversely affect the surroundings or the community.

Planning permission considers aspects like the appearance of buildings, the use of land, and the potential impact on local infrastructure and the environment.

Factors Influencing the Need for Planning Permission for Driveways

When contemplating installing or altering a driveway, the necessity for planning permission can vary based on several factors. Understanding these can save homeowners from inadvertent non-compliance with local regulations.

Here are the primary factors influencing the need for planning permission for driveways:

Material Used

Permeable materials, like gravel or permeable concrete block paving, often don’t require planning permission. However, using non-permeable materials might necessitate it, especially if the surface area exceeds five square meters.

Size of the Driveway

Larger driveways may affect drainage patterns or involve removing significant green space; hence, they might need permission.

Location

Properties located in designated areas, such as conservation areas, listed buildings, or Areas of Outstanding Natural Beauty (AONB), typically have stricter regulations.

Access to a Highway

Permission is usually mandatory if a new access point to a highway is needed or if the nature of an existing one is to be changed.

Visual Impact

Driveways that significantly alter the appearance or character of the surrounding area, especially in densely populated neighbourhoods, might need approval.

Drainage Considerations

Driveways that could potentially increase flood risk by redirecting runoff water may need planning permission.

Tree Preservation Orders (TPO)

Permission will likely be needed if the driveway’s installation or alteration necessitates removing or pruning protected trees.

Boundary Walls or Fences: Altering or installing walls, fences, or gates as part of the driveway project can also trigger the need for planning permission.

Lighting

Installing significant or high-intensity lighting on or around the driveway might be subject to permissions, especially in sensitive areas.

Historical or Architectural Significance

Homes or areas with historical or architectural importance may have additional requirements or restrictions.

Benefits of Block-Paved Driveways

  • Durability and strength.
  • Versatility in design and colour options.
  • Ease of repair and maintenance.
  • Improved property value.

When Will You Need Planning Permission for Your Driveway?

Deciding to install or modify a driveway is not always straightforward when it comes to permissions. While some changes might seem minor, they could still require official approval.

Here’s when you will typically need planning permission for your driveway:

Use of Impermeable Materials

Suppose the driveway area exceeds five square meters and uses impermeable materials (like traditional concrete or asphalt) that do not allow water to drain through. In that case, you will need planning permission.

New or Altered Access to Main Roads

If your driveway involves creating a new access point to a main road or altering the nature of existing access, you’ll typically need permission.

Conservation Areas and Listed Buildings

Suppose your property is in a conservation area, a designated Area of Outstanding Natural Beauty (AONB), or a listed building. In that case, you’ll likely have to obtain permission for any significant driveway changes.

Removing or Pruning Protected Trees

Trees with Tree Preservation Orders (TPO) cannot be removed or significantly pruned without specific consent. If your driveway work impacts such trees, you’ll need approval.

Significant Changes in Levels

If the driveway project involves significant alterations to ground levels, especially if it might affect neighbouring properties, then planning permission might be required.

Boundary Alterations

Erecting or altering walls, fences, or gates adjacent to the public road as part of the driveway work can trigger the need for permission.

Boundary Alterations

Erecting or altering walls, fences, or gates adjacent to the public road as part of the driveway work can trigger the need for permission.

Lighting Installations

If your driveway project includes the installation of significant or intrusive lighting, especially in sensitive or residential areas, it might be subject to permission.

When You Don’t Need Planning Permission?

In many cases, you can make changes to your property without seeking planning permission, thanks to what is known as “permitted development rights.” Here are instances when you typically don’t need planning permission:

Permeable Driveways

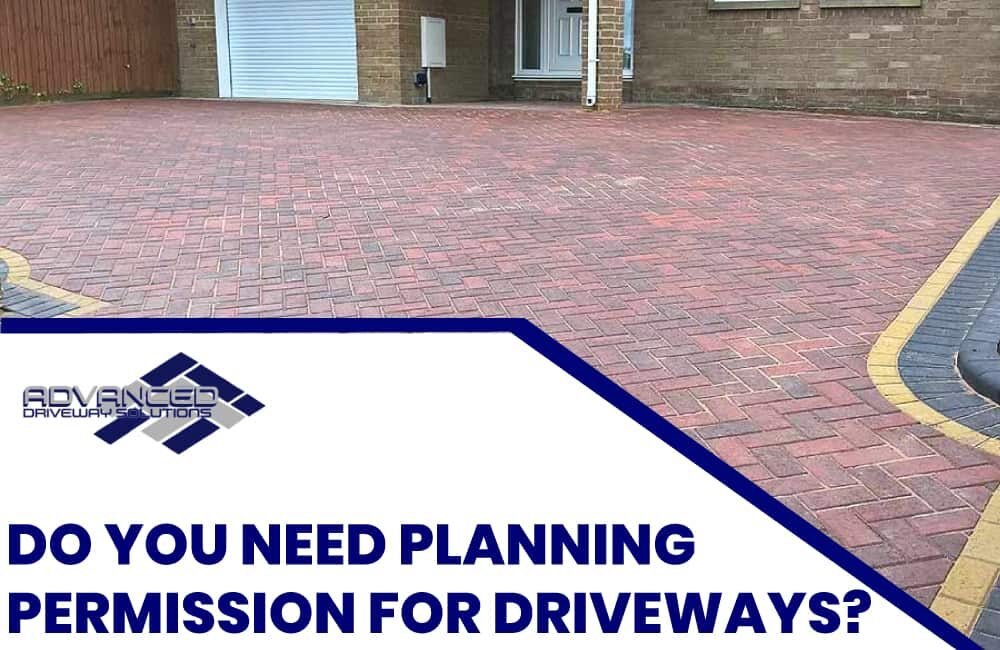
If you’re using permeable materials like gravel, permeable concrete block paving, or porous asphalt, and water can drain freely, planning permission is often optional.

Small Areas

For driveways using impermeable materials, if the area is less than five square meters, you usually don’t need planning permission.

Interior Changes

Most internal alterations don’t require permission, such as remodelling a kitchen or bathroom unless they affect a listed building.

Minor Exterior Changes

Many small modifications, such as installing satellite dishes and security cameras or performing minor repairs and maintenance using materials similar to the existing structure, are typically exempt.

Building at the Rear

Single-story extensions or conservatories at the rear of the property might not require planning permission if they meet specific size and boundary criteria.

Loft Conversions

Converting a loft can fall under permitted development rights if it doesn’t exceed specific volume limits and respects certain design parameters.

Garden Sheds and Outbuildings

Building a shed, greenhouse, or summerhouse in the garden often only needs permission if it adheres to height and size restrictions and is used for a purpose incidental to the main dwelling.

Fences and Walls

In many places, you can erect or alter fences, walls, and gates without planning permission, as long as they don’t exceed a particular height and aren’t adjacent to a public highway.

Solar Panels

Installing solar panels on the roof of a property usually falls under permitted development rights if they adhere to certain conditions regarding size and position.

Use of Building

Changing the use of a building (e.g., from an office to a shop) might not require planning permission if the change is within specific use classes.

Temporary Buildings

In some cases, structures meant for short-term use (e.g., construction site offices) are exempt from planning permission for a limited time.

Applying for Planning Permission for Your Driveway

Applying for planning permission for your driveway can seem daunting, but it becomes more manageable by breaking down the process step-by-step. Here’s a guide to help you navigate the process:

Research Local Policies

Familiarise yourself with local policies and criteria related to driveways from your local planning authority’s website.

Some councils offer a pre-application advice service. Understanding if your project is likely to be approved can be beneficial.

Prepare Necessary Documentation

Drawings: You’ll typically need detailed, scaled drawings of the proposed driveway. This should show both the current layout and the proposed changes.

Design and Access Statement: While only sometimes mandatory for driveways, some councils might require this. It’s a report outlining the design principles and concepts applied to the project.

Location Plan: A map (usually at a 1:1250 scale) that shows the site and its surrounding context.

Site Plan: A detailed plan (often at a 1:500 scale) showing the proposal’s full extent.

Complete the Application

Many councils offer online submission through the Planning Portal or their website. If not, paper forms can usually be downloaded.

Make sure you fill out all relevant sections and provide accurate information. Incomplete applications can cause delays.

Pay the Application Fee

Fees can vary depending on the nature and scale of the project. Check with your local council for the exact amount.

Online submissions usually allow for electronic payment.

Submit the Application

If applying online, follow the portal’s instructions. For paper submissions, you’ll often need multiple copies of all documents, and they can be sent or hand-delivered to the council’s planning department.

Wait for Decision

  • Once submitted, the council will validate the application, ensuring all documents are present and correct.
  • Neighbours and other stakeholders might be notified and given a chance to comment.
  • The decision process can vary in time, but typically, decisions for minor projects like driveways are made within 8 weeks.

Receive Decision

  • You’ll either receive permission (possibly with conditions) or have your application refused.
  • If refused, the decision will provide reasons. You can either adjust your plans and reapply or appeal the decision.

How Long Does Planning Permission Last Once It’s Granted?

Once granted, planning permission typically lasts three years from the approval date. This means that the commencement of the development, not its completion, must occur within this three-year window. If work does not begin within these three years, the planning permission usually lapses and is no longer valid.

There are some instances where a shorter or longer duration might be specified, but the standard is three years. It’s crucial for homeowners and developers to be aware of this timeframe, as failure to act within the permitted period means they would need to reapply for planning permission, which can be both time-consuming and costly.

What To Do When a Driveway Planning Application is Rejected?

If your driveway planning application is refused, it can be disheartening, but there are steps to take. Firstly, review the reasons for refusal given by the local authority. This feedback provides insight into what aspects of the proposal were problematic.

You can then revise your plans to address these issues and resubmit the application. Alternatively, consider seeking a pre-application discussion with the planning department to understand their concerns better. If you firmly believe the refusal was unjust, you have the right to appeal the decision, typically within a set timeframe.

Frequently Asked Questions

What is the difference between “planning permission” and “building regulations”?

While both are concerned with property development, planning permission deals with the principle of whether you can go ahead with a building project (based on its appearance, use, and location), whereas building regulations set standards for the design and construction to ensure health and safety.

What is “permitted development rights”?

Permitted development rights allow homeowners to make certain modifications to their property without needing to apply for planning permission. However, there are limits and conditions, so checking specifics with your local council is essential.

Conclusion

Navigating the intricacies of planning permission for driveways requires a thorough understanding of local regulations and guidelines. While many modifications can proceed under permitted development rights, significant changes, especially those involving impermeable materials or affecting public roads, often require explicit permission.

The process involves research, documentation preparation, and engagement with local planning authorities. Should an application be refused, it’s essential to understand the reasons, consider revisions, or even appeal if deemed necessary. Regardless of the project’s nature, proactive communication with your local council and, if needed, consultation with planning experts can smooth the path to a successful and compliant driveway transformation.

Eco-Friendly-Block Paving Solutions For 2023- Service in Morecam
Block Paving Blog

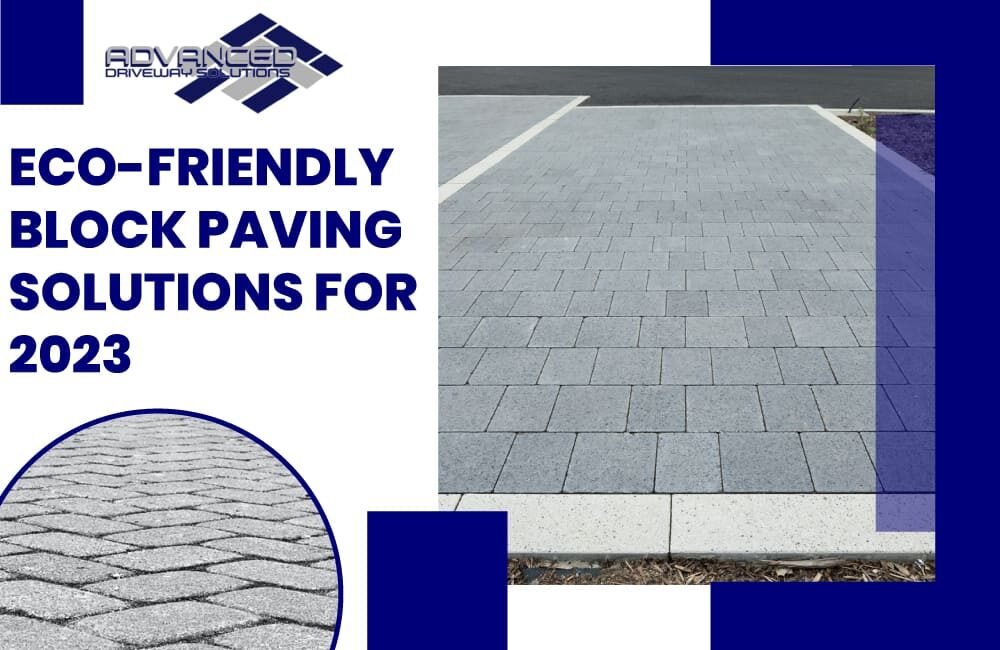
Eco-friendly Block Paving Solutions for 2023

As urban landscapes rapidly evolve, the quest for sustainable building solutions has never been more pressing. One area witnessing a green revolution is the world of paving. Traditionally, paving has been associated with materials and processes that can strain the environment. However, 2023 heralds a transformative era for eco-conscious homeowners and urban developers.

Today, block paving is not just about aesthetic appeal or durability; it’s about making responsible choices for the planet. With rising concerns over climate change and the pressing need for sustainable urban drainage systems, eco-friendly block paving has transitioned from a niche interest to an industry standard. Whether you’re planning a new driveway, revitalising public spaces, or just keen to stay abreast of the latest green construction trends, the eco-friendly block paving solutions emerging this year are both innovative and inspiring. Dive with us into the world of sustainable paving and discover how the blocks you choose can leave a lasting, positive impact on the environment.

The Importance of Environmental Sustainability

Our planet is at a crucial juncture. The devastating effects of climate change, deforestation, pollution, and overconsumption are evident in every corner of the world. From shrinking glaciers and rising sea levels to loss of biodiversity and extreme weather events, the signs are clear: human actions have accelerated environmental degradation.

Why Sustainable Alternatives Matter

Enter sustainable alternatives – these are not just trendy buzzwords but essential lifelines for our planet’s future. By adopting eco-friendly practices and materials, we are reducing the harm inflicted on the environment and actively contributing to its recovery. Sustainable solutions go beyond just addressing the symptoms; they target the root causes of environmental problems. For instance, shifting from fossil fuels to renewable energy sources directly combats the rise in harmful greenhouse gases. Similarly, opting for sustainable agriculture over industrial farming protects our soil and water resources.

A Ripple Effect of Change

One of the most remarkable aspects of sustainable alternatives is the ripple effect they create. When one industry or individual adopts eco-friendly practices, it often inspires and influences others to do the same. This collective shift in mindset and action can lead to significant positive changes on a global scale.

The Path Forward

Embracing sustainable alternatives is not a choice but a necessity. If we hope to leave behind a thriving, healthy planet for future generations, prioritising sustainability in our daily decisions, industries, and governance is paramount. The road to recovery may be long, but with sustainable practices at its core, it’s a journey worth embarking on.

Benefits of Eco-friendly Block Paving

1. Enhanced Stormwater Management

Eco-friendly block paving often features permeable designs. This means that water can seep through the gaps and be absorbed into the ground during rainfall, reducing the risk of flooding and preventing water pooling. It aids in replenishing groundwater and mitigating the heat island effect in urban areas.

2. Durability and Longevity

Green block paving solutions, like those made from recycled materials or specially formulated porous concrete, often have extended lifespans. They are designed to be robust, resilient to wear and tear and require fewer replacements over time. This means reduced resource consumption and waste generation in the long run.

3. Lower Carbon Footprint

Eco-friendly block paving materials are typically manufactured using processes that emit fewer greenhouse gases compared to traditional methods. Moreover, using recycled or sustainably sourced materials ensures minimal energy consumption and waste.

4. Improved Air and Water Quality

Permeable block paving systems can filter, trapping pollutants and preventing them from entering waterways. This helps maintain cleaner rivers and oceans. Plus, with the reduced heat island effect, there’s lower demand for air conditioning, leading to reduced energy consumption and fewer emissions.

5. Biodiversity Boost

Specific eco-friendly paving options, like grass or turf pavers, incorporate greenery. This adds aesthetic appeal and provides habitats for micro-organisms and supports local flora, enhancing biodiversity in urban areas.

6. Economic Savings

While the initial cost of eco-friendly block paving might be higher, the long-term savings are notable. Reduced maintenance, longer lifespan, and potential savings from stormwater management infrastructure can result in overall cost benefits.

7. Ethical and Aesthetic Appeal

Using environmentally-friendly materials and solutions often comes with a unique aesthetic appeal. These materials can offer homeowners and businesses a distinctive look while also serving as a testament to their commitment to sustainability.

8. Boost in Property Value

With the growing emphasis on sustainability, properties that feature eco-friendly installations, including green block paving, can witness increased market value. Sustainable homes and commercial spaces are becoming more desirable to environmentally-conscious buyers and renters.

Top Eco-friendly Block Paving Materials for 2023

1. Recycled Plastic Pavers

Overview: These pavers, constructed from reclaimed plastic waste, are robust, durable, and resistant to cracking or breaking.

Benefits: Reduces plastic waste in landfills, requires less energy for production compared to new plastic or concrete, and offers longevity.

2. Porous Concrete Pavers

Overview: Unlike traditional concrete, porous concrete allows water to pass through, aiding in stormwater management.

Benefits: Mitigates flooding risks, helps replenish groundwater, and offers a robust surface comparable to traditional concrete.

3. Reclaimed Stone Pavers

Overview: These are salvaged from old structures, pathways, or quarries and repurposed as pavers.

Benefits: Prevents waste, reduces the need for new stone extraction, and offers a rustic, time-worn aesthetic appeal.

4. Grass and Turf Pavers

Overview: These pavers are designed with spaces for grass or turf to grow through, creating a blend of hard and soft landscaping.

Benefits: Enhances biodiversity, offers natural cooling, and aids in stormwater management.

5. Composite Pavers

Overview: Made from a combination of recycled materials such as rubber and plastic, these pavers offer the best of both worlds.

Benefits: Durable, versatile in design, and promotes the reuse of potential waste materials.

6. Rammed Earth Pavers

Overview: Created by compressing earth, possibly with a small addition of cement, these pavers are natural and have been used in construction for centuries.

Benefits: Low carbon footprint, uses locally sourced materials and provides a unique, natural aesthetic.

7. Bamboo Pavers

Overview: Bamboo, a rapidly renewable resource, is innovatively used as a material for certain outdoor flooring solutions.

Benefits: Highly sustainable, durable when treated correctly, and offers a distinctive aesthetic.

8. Rubber Pavers

Overview: Rubber pavers are often made from recycled tires and are resilient and shock-absorbent.

Benefits: Reduces the number of tires in landfills, provides a slip-resistant surface, and offers cushioning, which is especially beneficial in play areas.

In 2023, the emphasis on environmental sustainability continues to grow, and the block paving industry is no exception. These eco-friendly materials are paving the way (pun intended) for a future where aesthetics, functionality, and sustainability go hand in hand.

The Bottom Line

In the face of escalating environmental concerns, the significance of sustainable solutions has become paramount. Eco-friendly block paving emerges as a beacon in construction and landscaping, demonstrating how innovation can blend with responsibility. From its undeniable environmental benefits, like enhanced stormwater management and reduced carbon footprint, to its aesthetic and economic advantages, green paving sets a gold standard.

The array of materials available in 2023, be it recycled plastic, porous concrete, or reclaimed stone, underscores a pivotal shift in the industry. These materials champion sustainability and meet, if not exceed, the standards of traditional options. As urban landscapes continue to evolve, our choices in seemingly mundane aspects, like paving, can have profound impacts. We achieve a more sustainable, harmonious, and aesthetically pleasing future by embracing eco-friendly block paving solutions.

Block Paving Driveway Cost -  A Complete Guide in Morecambe UK-A
Block Paving

Block Paving Driveway Cost –  A Complete Guide

For residents of Morecambe, enhancing the frontage of their homes often beckons the alluring world of block paving driveways. Not only do they elevate the aesthetic quotient, but their resilience ensures a driveway that stands the test of time. Yet, when you’re in the picturesque coastal town of Morecambe, the question isn’t just about block paving. It’s “What’s the Block Paving Driveway Cost in Morecambe?”

Every homeowner wants to strike a balance between obtaining that gorgeous driveway and ensuring it doesn’t break the bank. Costs can indeed vary, influenced by design intricacies, material choices, and local labour rates. Whether you’re a Morecambe native looking to give your home a facelift or someone considering a move to this beautiful town, it’s imperative to get a handle on the financial aspect of such an investment.

Get insight into the specific factors that shape the Block Paving Driveway Cost in Morecambe, ensuring you’re well-equipped to make an informed decision.

How Much Would it Cost to Block Pave My Drive?

In the UK, block paving has remained a popular choice for homeowners due to its durability and visual appeal. Prices can fluctuate depending on the quality of materials chosen and the complexity of the design.

As a rough estimate, a standard-sized driveway of about 50 square meters could cost anywhere from £2,000 to £5,000, or even more, based on the average pricing mentioned. Budgeting a bit more than the estimated cost is always wise to account for any unforeseen expenses.

While the initial outlay might seem significant, a well-paved driveway can enhance property value and curb appeal, proving to be a worthy investment in the long run. However, consulting local providers will yield the best results for the most precise figure tailored to your specific needs.

Factors affecting the cost of paving a driveway

Paving a driveway is an investment that not only improves the aesthetics of a property but also its functionality and value. The cost of such a project can vary widely based on several factors. Understanding these elements can help homeowners make informed decisions and budget appropriately.

1. Material Choice

The type of material chosen is one of the primary determinants of cost. Common materials like asphalt or gravel tend to be more affordable than brick, cobblestone, or high-end natural stones like granite. Each material has its own price point, maintenance needs, and lifespan.

2. Size and Thickness

Naturally, larger driveways require more materials and labour, increasing the total cost. Additionally, the thickness of the paving material, especially in cases like concrete or asphalt, can influence the price.

3. Labor Costs

Labour costs can vary based on the region, the workforce’s experience, and the job’s complexity. Some intricate designs or patterns may need skilled artisans, which can elevate the labour expenses.

4. Drainage Needs

Proper drainage is crucial for the longevity of a driveway. If additional work is needed to ensure efficient water runoff, like installing drains or creating slopes, this can add to the project’s cost.

5. Base Preparation

A solid foundation is essential for a durable driveway. Depending on the current state of the driveway area, significant excavation, grading, or the addition of a gravel base might be necessary, affecting the overall price.

6. Geographical Location

Prices for materials and labour can vary based on the location. For instance, remote areas might incur higher transportation fees for materials.

7. Existing Driveway Removal

If an existing driveway needs to be removed or repaired, this can add to the project’s expenses. The process might involve breaking down old materials and ensuring the area is ready for new installation.

How Much is a New Driveway in The UK?

For an average driveway size of around 50 square metres, you’re looking at costs ranging from £1,000 (for essential gravel driveways) up to £5,000 or more (for high-end block paving or concrete driveways). These are rough estimates, and actual prices can differ based on various factors. Always obtain multiple quotes from local contractors for the most accurate and up-to-date pricing.

Cost for Different Types Of Paving Driveways

When evaluating the expense of block paving driveways, it’s vital to understand that costs can fluctuate based on various factors, from the materials chosen to the intricacies of the job at hand.

Here’s a breakdown:

Common Block Paving Materials

Different materials can be used for block paving, each with its own aesthetic and functional attributes. These include bricks, concrete blocks, natural stone, and more. The choice of material can significantly influence the driveway’s appearance, durability, and overall cost.

Block Paving Costs By Job Type

The specific task being undertaken, whether it’s a new installation, repair, or replacement, can alter the costs. Replacing or repairing specific sections is less expensive than paving an entirely new driveway.

Block Paving Cost Per m² (Square Metre)

This provides a standardised measure, helping homeowners estimate the cost based on the size of their driveway. The price per square metre will vary depending on the chosen material, design complexity, and regional factors.

Permeable Block Paving Prices

Permeable block paving allows water to seep through, aiding in drainage and reducing water runoff. These specialised blocks often come at a premium due to their ecological benefits and technical design.

Block Paving Bricks Prices

Traditional block paving bricks are widely used due to their classic appearance and reliability. The cost can vary based on the quality, colour, and pattern of the bricks chosen.

Concrete Block Paving Cost

Concrete blocks are durable and can mimic the appearance of various materials. They are often more cost-effective than natural stone, but the price can differ based on the finish and quality.

Block Paving Labour Costs

Labour typically constitutes a significant portion of the overall cost. Rates can vary based on the experience of the workforce, the region, and the intricacies of the job. Skilled artisans may charge a premium, especially for intricate designs.

What Additional Costs are Involved with Block Paving Installation?

Several additional expenses can emerge when installing block paving besides the direct costs of materials and labour.

Here’s an overview of potential additional costs to consider:

Site Preparation

Before laying the paving blocks, the site might require excavation, grading, or levelling. Removing existing surfaces or materials, like old concrete or vegetation, can also add to the costs.

Waste Disposal

Once the site is prepared, you may have waste materials like soil, old paving, or vegetation that need to be disposed of. Many regions charge for construction waste disposal, and the cost might increase depending on the waste amount.

Base Materials

A solid foundation, usually made of compacted crushed stone or sand, is essential for the longevity of block paving. The costs of these foundational materials and their installation should be factored in.

Edge Restraints

These are vital to prevent the blocks from shifting out of place. The cost of edge restraints, whether they are made of metal, plastic, or precast concrete, should be considered.

Drainage Solutions

Proper drainage is critical to prevent water pooling and to extend the life of the paving. Installing drainage channels, drains, or soakaways might lead to additional costs.

Sealants and Sand

After laying the blocks, you may need kiln-dried sand to fill the joints and a sealant to protect the paving from stains, wear, and the growth of weeds.

Additional Accessories

Features like manhole covers, custom steps, or patterns using differently coloured or more expensive blocks can raise the overall price.

Unexpected Complications

Factors like poor soil quality, hidden obstructions, or unanticipated groundwork can result in additional labour and material costs.

Maintenance Tools and Supplies

While not an immediate installation cost, consider the expense of tools or materials you might need for future maintenance, such as cleaning solutions or replacement blocks.

Permit or Licensing Fees

Depending on your region, you may need a permit to pave or repave your driveway, which could carry a fee.

FAQs

Can I Install Block Paving Myself?

Installing block paving requires careful planning, the suitable materials, and meticulous attention to detail, especially in preparing the base and ensuring proper drainage. While many homeowners take on this task to save on labour costs, it’s essential to be ready for the physical work involved and have the necessary tools. DIY block paving can be rewarding if you’re confident in your abilities and have thoroughly researched the process.

Do Building Regulations Affect Block Paving Installation?

Building regulations can influence block paving, primarily concerning drainage and permeability. Sustainable Urban Drainage Systems (SuDS) ensures proper water runoff. Some areas may require planning permission for certain paving projects. Local regulations might also govern material choice and access restrictions.

Is Block Paving Cheaper Than Paving?

Block paving and paving (often referring to slab paving or concrete paving) can have different cost structures. While the initial material cost for block paving might be higher, the overall installation can sometimes be cheaper due to its modular nature and ease of repair. Conversely, large paving slabs or poured concrete might have lower material costs but can be more expensive to install and repair.

The Bottom Line

Block-paved driveway not only enhances the aesthetic appeal of your property but also promises durability and minimal maintenance over the years. Additionally, the vast array of design options and materials allows homeowners to customise their driveway to their liking.

Yes, there are cheaper alternatives available, but the unique blend of durability, customisation, and elegance that block paving offers is hard to match. As with any home improvement project, getting multiple quotes and researching the contractors in your area is advised to ensure you’re receiving a fair price and quality workmanship.

How to Choose Block Paving Colours? in Morecambe-Advanced Drivew
Block Paving Blog

How to Choose Block Paving Colours?

When it comes to enhancing your Morcambae home’s entrance, the driveway is an emblem of both style and functionality. Often the first visual touchpoint for visitors, it can set the mood for the entire property experience. As a cornerstone of home design, its significance in curb appeal cannot be overstated. The choices you make regarding block paving colours and types in Morcambae can elevate your home from the ordinary to the extraordinary.

Every driveway tells a story. It might be of a house that’s stood for decades, its driveway bearing witness to countless memories, now ready for a refreshed look. Or it could be a new canvas, waiting for the stroke of design genius. In either scenario, the diverse block paving options available become crucial. From the timeless elegance evoked by traditional charcoal blocks to the sophisticated intricacy of the herringbone pattern, each selection narrates a unique tale.

How to Choose the Colours of Your Block Paving Driveway?

Choosing the colours of your block paving driveway requires a combination of aesthetic judgment and practical considerations.

Here’s a guide to help you navigate this decision:

1. Consider the Aesthetics of Your Home

Existing Colours: Examine the colours of your home’s exterior. The driveway should complement these shades rather than clash with them.

Style: If your home has a modern design, sleek greys or monochromatic tones may be best. For a more traditional home, consider warm or rustic tones.

2. Factor in the Surrounding Landscape

Garden and Plants: Look at the dominant colours in your garden. A driveway that complements these hues can create a harmonious look.

Natural Elements: If you’re near the woods, beach, or other natural settings, consider colours that fit organically with the environment.

3. Think About Maintenance

Stain Visibility: Lighter colours might show stains more readily than darker tones. If you’re worried about maintenance, opt for medium to darker shades or speckled patterns that can hide stains.

4. Test Samples

Before committing, get a few sample blocks in your chosen colour. Place them in the intended area and observe them at different times of day and under various lighting conditions.

5. Popular Colour Choices

Traditional Charcoal: Versatile and often suits various architectural styles.
Brindle: A mix of red and charcoal, offering warmth.
Buff: Sandy or light brown, which can provide a soft, neutral look.
Greys and Silvers: Modern and often used for contemporary designs.

6. Seek Inspiration

Look at magazines, online galleries, or neighbourhood homes to see what appeals to you.

7. Practical Considerations

Heat Absorption: Darker colours might absorb more heat, which can be a factor if you live in a hot climate.

Fade Resistance: Some colours might fade faster under direct sunlight. Look for pavers treated with UV protection.

What are the Different Types of Block Paving?

1. Herringbone (45° and 90°)

Interlocking V-shaped patterns are arranged either at a 45° or 90° angle to the boundary. It is ideal for driveways as the interlock ensures minimal movement of blocks, resisting vehicular forces.

2. Basketweave

Alternating pairs of blocks laid vertically and horizontally. This creates a weave-like pattern reminiscent of woven baskets. Best suited for patios and walkways.

3. Stretcher Bond

The simplest pattern involves laying blocks side by side in a linear arrangement, with each row offset by half a block. This pattern mimics traditional brickwork.

4. Stack Bond

Blocks are laid directly on top and beside each other, creating neat rows and columns. It provides a contemporary and orderly appearance.

5. Circular/Radial

Blocks are laid in a circular pattern emanating from a central point. This design can be a focal point and is often combined with other patterns.

6. Tumbling

Blocks are ‘tumbled’ to give them a weathered and aged appearance. It’s not a specific pattern, but rather a treatment that can be applied to blocks in various patterns.

7. Diamond

Central diamonds are created using different-coloured blocks and can be combined with other patterns like herringbone or stretcher bonds as a decorative feature.

8. Random Course

Different widths of blocks are used in random sequences, offering a less structured, more organic appearance.

9. Interlocking

Blocks are shaped, so they interlock with each other, providing high stability. Commonly used in driveways to handle heavy loads.

10. Cobbled

Blocks are designed to mimic old-world cobbled streets with rounded tops. Perfect for creating a rustic or vintage look.

How To Choose The Pattern For Block Paving?

Choosing the right pattern for block paving is essential for the paved area’s functionality and aesthetics. Here’s a guide to help you make the right decision:

1. Assess the Area

Larger patterns might be overwhelming in small spaces, while intricate patterns might get lost in expansive areas.
Some patterns work better with specific shapes. For instance, circular patterns are ideal for round spaces.

2. Functionality

Patterns like herringbone are preferred for driveways due to their interlocking strength against vehicular forces.
Some patterns might be easier to repair if individual blocks need replacement.

3. Aesthetic Appeal

HMatch the pattern with the architectural style of your home. Modern homes might benefit from a stack bond, while older homes might suit a cobbled look.

Some patterns can make a space look wider or longer. For instance, a stretcher bond can elongate an area.

4. Complementary Features

If you have existing landscaping or features like a garden, pool, or fountain, consider how the pattern will complement or contrast these elements.

5. Regional Climate

In areas prone to heavy rain or snow, opt for patterns that accommodate effective drainage.

6. Personal Preference

Always consider what appeals to you personally. It’s your space, and your satisfaction is paramount.

7. Seek Inspiration

Look at magazines, local projects, online galleries, or even your neighbourhood to see what patterns appeal to you.

8. Professional Advice

Consult with professionals who can provide insights based on their experience. They might also introduce you to newer patterns or combinations.

9. Budget

While it’s essential to get a pattern you love, ensure it fits within your budget. Some intricate patterns might require more labor and thus be costlier.

10. Samples

Before finalizing, lay out a small sample area to get an idea of how the pattern looks in the actual space.

Innovative Trends in Block Paving Colours and Types

Block paving has evolved over the years, with emerging trends in colours and types reflecting both advancements in materials and shifting aesthetic preferences.

Some of the innovative trends in block paving:

1. Mixed Colour Palettes

Instead of monochromatic palettes, designers are blending different hues to create vibrant and eye-catching patterns.

2. Textured Finishes

Beyond the standard smooth finish, textured blocks – such as those mimicking natural stone or providing tactile surfaces – are gaining traction.

3. Eco-Friendly Pavers

These pavers are designed for sustainability, often made from recycled materials or designed to be permeable, allowing for better water drainage and reducing runoff.

4. Gradient Patterns

To create a dynamic and modern look, gradient patterns transition from one shade to another across the paved area.

5. Large Format Pavers

Larger blocks are becoming popular for their minimalist and contemporary aesthetic, reducing the number of joints and offering a clean look.

6. Natural Stone Mimicry

With advancements in manufacturing, concrete pavers can now closely mimic the look and texture of natural stones like slate, granite, or limestone at a fraction of the cost.

7. Geometric Patterns

Bold and intricate geometric designs, often combining different shapes and colours, make a statement in modern landscapes.

8. Glow-in-the-Dark Pavers

These pavers absorb sunlight during the day and glow in the evening, adding a magical touch to pathways and patios.

9. Integrated Technology

Some modern pavers come integrated with tech features, such as heating elements to melt snow or lights for added nighttime aesthetics.

10. Custom Designs

With the flexibility in manufacturing, homeowners can now get custom-designed pavers, be it in terms of unique colours, patterns, or even embossed designs.

Maintenance Tips Based on Block Paving Colour and Type

Proper maintenance of block paving ensures longevity, aesthetics, and functionality. Maintenance can vary based on the colour and type of block paving. Here are some tailored tips:

1. Light-Coloured Paving

Lighter colours tend to show stains more clearly. Avoid spilling oil, grease, or strong-coloured liquids.
Sweep frequently to prevent dirt accumulation, and wash with soapy water periodically.

2. Dark-Coloured Paving

Dark colours can fade over time due to UV exposure. Consider sealants with UV protection.
Dark colours absorb more heat. Be cautious walking barefoot during hot days.

3. Natural Stone Blocks

Natural stone can be porous. Use a suitable sealant to prevent stains and moss growth.
Avoid harsh chemicals; instead, opt for pH-neutral cleaners.

4. Concrete Blocks

Concrete blocks may benefit from periodic sealing to prevent wear and enhance colour longevity.
For oil stains, use a degreaser, and for rust stains, consider a rust remover.

5. Textured or Tactile Blocks

The textured surface can trap more dirt. Use a brush with stiff bristles for effective cleaning.
High pressure can damage the textured finish. If necessary, use low pressure.

6. Mixed Colour Patterns

Ensure uniform cleaning to avoid inconsistent colour appearances from one section to another.
Permeable Pavers

These are designed for water drainage. Ensure the gaps remain clear of debris.
If the jointing sand is washed away, it should be refilled to maintain the permeability.

Also Read: Modern Block Paving Border Ideas in Morecambe

The Bottom Line

Block paving, with its vast array of colours, patterns, and types, offers homeowners an exceptional opportunity to boost curb appeal and property value. From the rich, timeless shades of charcoal to the intricate designs of herringbone and basketweave, each choice tells a story of personal style and architectural harmony. Moreover, as innovations emerge, the world of block paving continues to expand, blending sustainability with artistry.

Yet, irrespective of the colours and patterns you gravitate towards, maintenance remains crucial for longevity. If the myriad of options feels overwhelming, remember that expert advice is just a call away. Crafting the perfect entrance is a blend of informed decisions and personal flair, ensuring your driveway remains a lasting testament to your home’s character.